It's been a long time since I've posted a recipe. While we were traveling, we stopped at a Trader Joe's and they were sampling their Tomato Feta Soup. We all liked it, even Ashlyn, who typically doesn't like tomato soup. So when we got home, I went online looking for a copycat recipe. And couldn't find one. I did, however, find the list of ingredients in their soup. I love using my Instant Pot for lunch. I can get everything in and then go back to doing school with the girls while it cooks. So I looked at different recipes and combined ideas and tweaked things, and considered the ingredients in Trader Joe's Soup and here's what I came up with. I'm not going to call this a copycat of Trader Joe's because I honestly don't have a very clear memory of what it tasted like (and since there aren't any Trader Joe's stores anywhere near here, I can't buy some to compare), regardless, we all liked this soup and I'll be adding it to our lunch rotation!
INGREDIENTS:
1/4 c butter
1 lg onion,chopped
handful of baby carrots, chopped
4 cloves garlic, minced
3 28 oz cans whole peeled tomatoes*
1 Tbsp each: dried basil, dried parsley, dried oregano, chili powder
2 bay leaves
1 c whole milk
salt to taste
Crumbled Feta cheese
* I substituted 4 c cubed fresh tomatoes for one can
Place butter in instant pot and push the Saute button. Once butter is melted, saute onions and carrots until soft. Add garlic and tomatoes (If using all fresh tomatoes you might need to add up to a cup of water or broth. The canned whole tomatoes had plenty of liquid in them, and we prefer thicker soups). Add seasoning and bay leaves. Press cancel to turn off the saute feature. Lock lid in place and make sure pressure valve is closed. Turn on manual for 5 minutes (high pressure). Allow to pressure to naturally release. Puree soup until smooth with immersion blender (or in batches in a regular blender). Stir in milk and salt to taste.
To serve, top each bowl with a spoonful of crumbled feta.
Showing posts with label Recipes. Show all posts
Showing posts with label Recipes. Show all posts
Monday, October 2, 2017

Tuesday, December 23, 2014
Candy Dreidel Making . . .

 This morning the girls enjoyed a yummy craft! I'd seen a few different variations online of making "dreidels" out of marshmallows, pretzel sticks, and Hershey's kisses. So this morning I set out the ingredients and when I suggested we look at the computer to see how to do it, the girls indignantly told me that they could figure it out their own way! So they did . . . here's their version of candy dreidels. (Ashlyn took the step-by-step pictures and they informed me that I "had to" post this on my blog. Enjoy!)
You will need:
pretzel sticks
large marshmallows
toothpicks
Hershey's kisses with soft centers (we went with dark chocolate mint ones)

Break the pretzel stick to be the length that you want for the "handle' of your dreidel.

Stick the pretzel into one end of the large marshmallow.
Gently push the toothpick into the chocolate kiss.

The kisses we used have a "truffle" center, so the toothpick went into the kiss easily, I'm not sure a toothpick would work with a plain chocolate kiss, I think in that case, it would work better to use frosting to stick the kiss to the marshmallow.
Stick the other end of the toothpick into the marshmallow and . . . you're done!
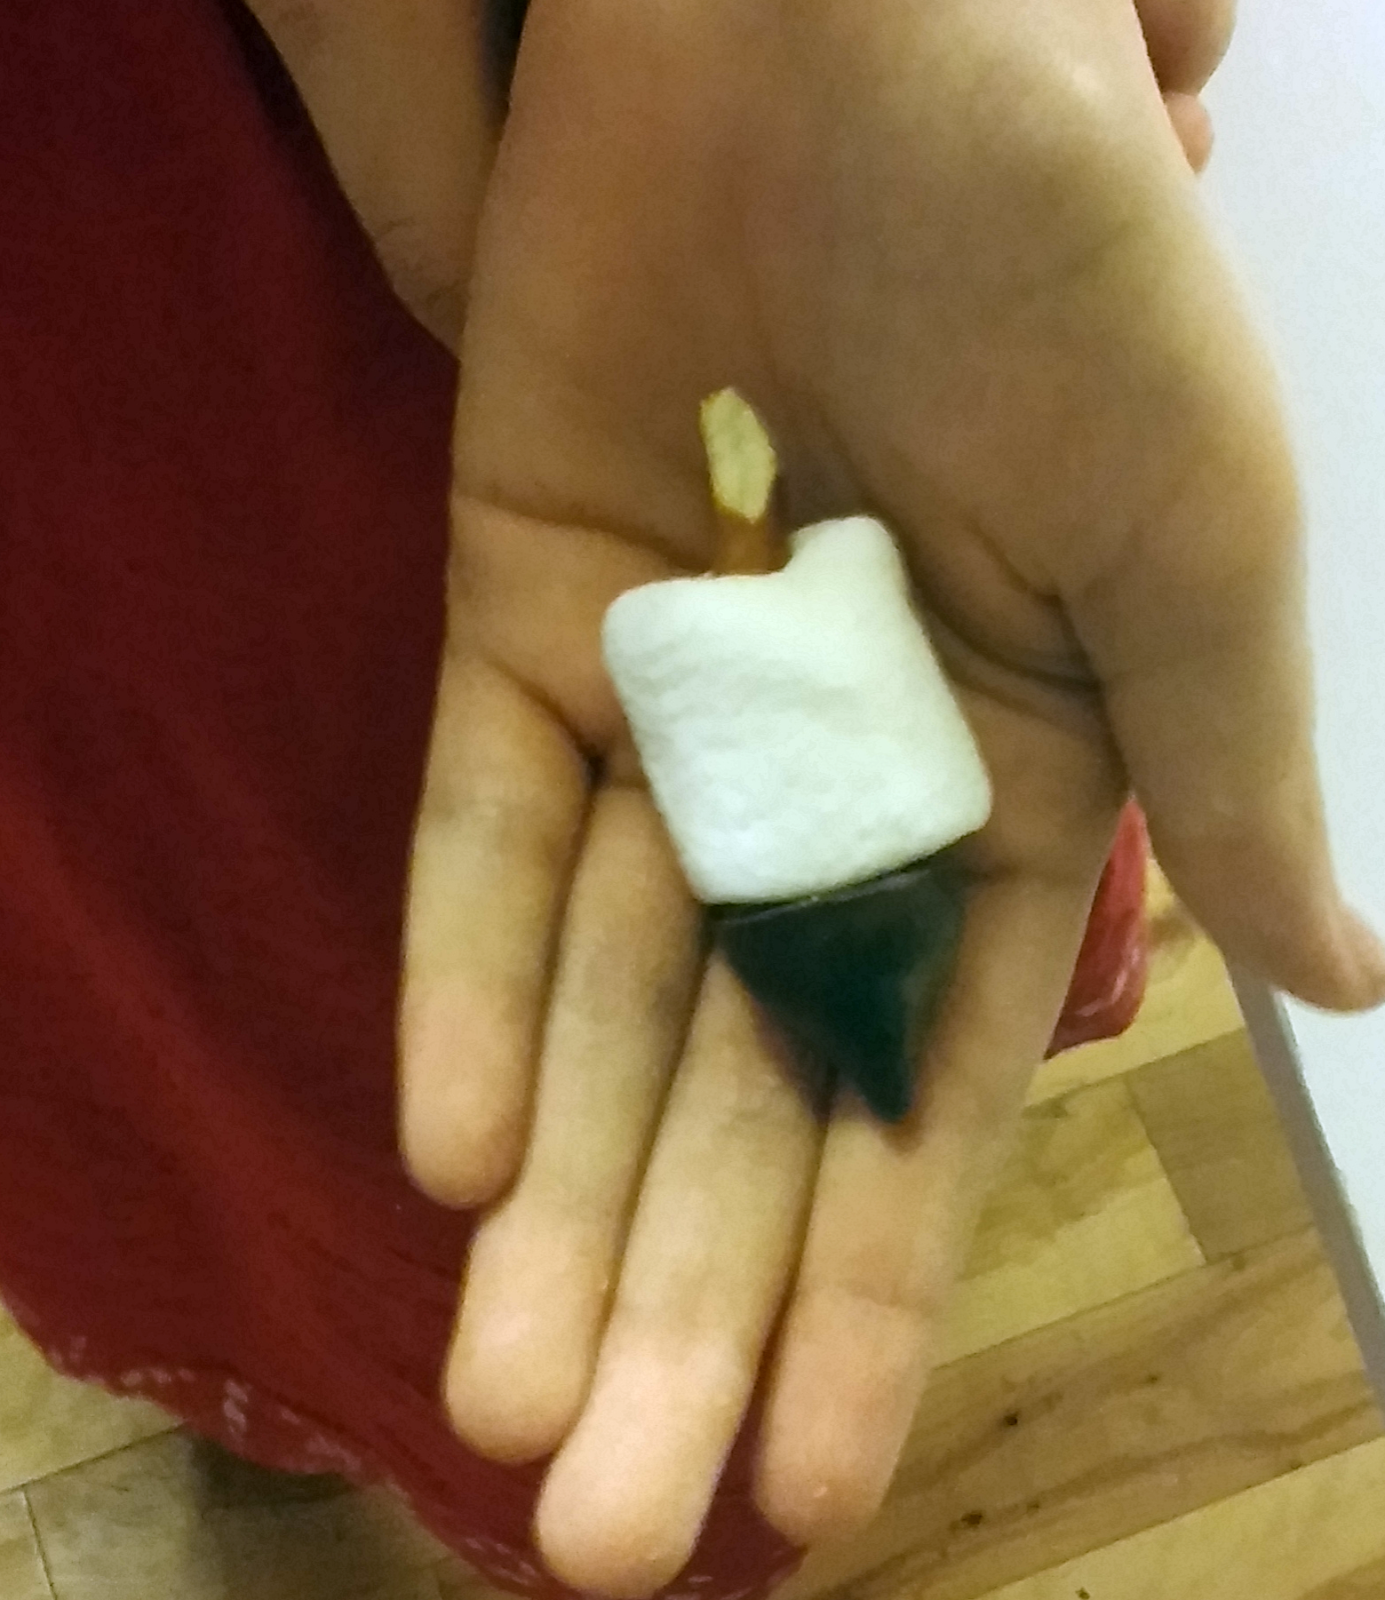
Be sure to warn/remind the people eating these that there's a toothpick inside!

visit Lisa's blog for more new recipes!
Monday, June 9, 2014
Recipe: Cucumber Chickpea Salad

With the heat of summer, we try to have salads and other no-cook meals as much as possible. One of our current favorites is cucumber chickpea salad.

2 c cucumbers, diced
1 pint grape tomatoes, halved
2 15oz cans chickpeas, drained & rinsed
1/4 c fesh squeezed lemon and/or lime juice
1/4 c olive oil
1 Tbsp fresh dill, snipped
1/2 c feta cheese, crumbled
salt, to taste
In a measuring cup, combine lemon/lime juice, olive oil, dill, and salt. Whisk together to make your dressing. Combine cucumbers, tomatoes and chickpeas in bowl. Toss with dressing and feta. Chill before serving.
On and be sure to watch out for little pickpockets who don't want to wait until lunchtime :)

Tuesday, April 15, 2014
Try a New Recipe: Matzah Pitzah

When I was a kid, my mom would make "pizzas" using english muffins for the crust, so we decided to try that with matzah, and it worked GREAT!! If you're not familiar with matzah, they're basically big square, rather tasteless crackers that are the "unleavened bread" of Passover.
So, here's the "recipe":
Matzah
marinara or pizza sauce
shredded cheese
chopped olives and/or other pizza toppings
Spread sauce, cheese and toppings on matzah crackers. Place on baking sheets and bake until cheese is melted. Cut each matzah into 4 pieces, and serve.
This is about the easiest possible meal! And it was good! I liked it better than the english muffin version! Little Bit wasn't impressed but I think she doesn't like the kind of tomato sauce we have right now (it's organic and I got it for less than $2/jar at an overstock grocer, so I got lots and the rest of us like it so she's just gonna have to live with it!).
So there's our recipe for this week! Happy Passover!!!
Head over to Try a New Recipe Tuesday to check out other great recipes!
Tuesday, March 4, 2014
Recipe: Potato Noodle Soup
 I'm not sure how it is, that I've never posted this recipe, it's my husband's favorite soup, and one that my mom's made since I was a kid. I think my mom has a real recipe with actual quantities, but I usually just use whatever I have on hand, or looks good.
INGREDIENTS:
onions, chopped
potatoes, cubed
chicken broth (or water and broth powder)
egg noodles
eggs
Put the broth on to start boiling while you chop the onions and potatoes (this time I used 2 onions, but not all of the potatoes pictured). My mom always peels her potatoes, I don't, I'm lazy and the peels have nutrients in them, and my family doesn't mind. Add a couple handfuls of egg noodles (I probably used a scant half of the package).
 While the soup simmers, scramble some eggs. I think I used 6 eggs. I scrambled them in butter,but didn't bother with any milk or salt since the eggs will be added to the soup.
Once the noodles and potatoes are cooked and the eggs are scrambled, add the eggs to the soup, and serve.
 If you have leftovers, the noodles keep absorbing the liquid, so you may need to add extra water or broth when you reheat the leftovers. By making this with vegetable broth, or a vegetarian chicken flavored broth powder, this is a great vegetarian alternative to chicken noodle soup. Visit Try a New Recipe Tuesday for more new recipes to try.
Tuesday, January 14, 2014
Recipe: Green Broccoli Soup

Awhile back when I was out running errands, Rodney showed the girls a bunch of cooking videos that he broccoli soup. Lexie was very intrigued by the recipe, which honestly, I didn't think sounded good at all. Last week was her week to make supper, and she really wanted to make this broccoli soup for supper one night. Finally, I told her that if she could get Daddy to find the video again, so she could watch it again and make sure she knew how to do it, she could try it.
found somewhere online, just short little "here's how to cook one thing" kind of videos. One was by Gordon Ramsey and was making
We didn't have specific amounts, if he gave them in the video, she didn't write them down, so here's what we did:
Bring a pot of water to a rolling boil. Meanwhile, cut a bunch of fresh broccoli (I think we used about 3 lbs, and it wasn't enough for a main dish for our family of 5) into florets (the video show how he does it). Add broccoli and some salt to boiling water, cook until tender.
Use a slotted spoon to transfer the broccoli into a bowl, add some of the cooking water. Blend with an immersion blender, adding more cooking water as needed. Add salt to taste.
Meanwhile place crumbled feta cheese (next time we'd like to try goat cheese, but we had feta on hand, so used that). in a pile in the bottom of each bowl (we also used chopped hickory nuts, but found they didn't add much, so won't bother with them next time). Ladle soup into bowl around soup.
It was DELICIOUS!!! Neither Rodney nor I were really expecting to like it. I don't dislike broccoli, but I generally prefer it WITH other things, and couldn't see pureed broccoli as being all that, but it was really good! We look forward to having it often :)

Try a New Recipe Tuesday
Monday, December 30, 2013
M is for Monkey Bread
 For the last several years, we've had the tradition of having Monkey Bread for Breakfast on Christmas morning.
Not only is it yummy, and unhealthy enough to fall firmly in the "treat" category, but it is also something the girls have fun helping me make on Christmas Eve, which equates to less work on Christmas morning!
I have no idea where I got the recipe, but here it is:
 1/2 cup sucanat (or sugar, but sucanat adds a little bit of healthier-ness to it)
1 Tbsp ground cinnamon
24 frozen bread rolls
1 stick butter, melted
1 Tbsp cinnamon
1/2 cup sucanat
At least 8 hours in advance, or the night before, combine first 2 ingredients to make cinnamon sugar. Wet dough balls slightly and roll in cinnamon sugar. Place in greased bundt pan. Melt butter and add to the additional cinnamon sugar (I also dump any leftover from the first batch in with it). Pour over the dough. cover with a towel and let raise 8 hours or overnight.
Bake at 350 for 30 minutes. Invert onto a plate to serve.

I'm linking up to Blogging through the Alphabet
and Try a New Recipe Tuesday
Tuesday, December 10, 2013
Recipe: Snow Ice Cream

I gave them a bowl, and told them to set it up on the cooler that lives on our back porch, so that it wasn't right down on the cats' level.
The girls spend ALL morning outside playing, and finally came in when they were starving to death (or so they said LOL). by then the bowl was about half full of snow, so I told them to go find a place of undisturbed snow and scoop a little off the top, not getting down to the dirt and stuff, to get the bowl closer to full.
 They did, and while they peeled off all their wet snow clothes, I made snow ice cream.
You need:
A big bowl of clean snow
milk
sugar (I use raw sugar, so it adds flavor too)
vanilla extract (you could probably leave it out, when using raw sugar)
sprinkle sugar and a little vanilla extract, if using, over the snow, then add a little milk, and start stirring. Keep adding milk, a dash at a time, until it all kind of sticks together. Taste, and add more sugar or vanilla if needed.
Eat it right away, because otherwise it melts into sweet, watery milk LOL.
I'm linking up to Try a New Recipe Tuesday
Tuesday, November 5, 2013
E is for Eggs!
 I decided to "multi-task" today. This week's Blogging Through the Alphabet letter is E AND I haven't posted a recipe on Try a New Recipe Tuesday for awhile, and have an egg recipe that I've been meaning to post . . .
Last summer we attended the rehearsal dinner for my cousin's wedding and the food was wonderful! One of the things I really enjoyed was a vegetable frittata. So once I was home, and realized how easy it is, I added it to my list of recipes to try. And a few weeks ago, Lexie made supper one night, and tried it out for me.
This is a wonderfully versatile recipe too! Whatever vegetables you have on hand, whatever herbs . . . I LOVE that!!!
INGREDIENTS:
14 eggs
2 c cheese
chopped vegetables of your choice (we used onions and broccoli and spinach)
herbs of your choice (I don't remember what Lexie snipped from our herb pots)
salt to taste
Preheat oven to 400. Heat butter, coconut oil, or olive oil in a large, oven-safe skillet. Saute vegetables until tender (since the spinach just needed to "wilt", I waited to add it right before adding the eggs). Meanwhile, stir together eggs, cheese, salt and herbs. When vegetables are tender, spread evenly in skillet, then pour eggs on top. Do NOT stir them. Cook until the sides begin to look firm, 1-2 min. Move skillet to the oven and bake until the eggs are set (10-15 min). Slice into wedges and serve.
This was a HIT all around! Super easy, tasted yummy, and just about the perfect amount for our family of 5, with a salad and some bread to round out the meal.

Tuesday, September 17, 2013
Recipe: Chickpea Salad Sandwiches
This is another one of those "so simple it's hardly a recipe" kinds of recipes, but it's also yummy!
My kids have never been much for sandwiches, in fact, for years, I rarely even had bread in the house, BUT now that we have music lessons that finish up right at (or past, if you ask my kids) lunchtime, packing lunches once a week is a part of our routine, and since we then eat those lunches as we're driving, they need to be low mess lunches (when we pack lunches to take to museums or the park or something, I'll often pack pasta salad or something similar), which tends to mean . . . sandwiches.

The kids do like egg salad, and will eat peanut butter and jelly (fruit juice sweetened jam), or peanut butter and (raw) honey, if I'm REALLY low on ingredients and time. And once in awhile, when I can get the Tofurkey vegetarian lunch "meat" on sale, we'll have lettuce, tomato, cheese and lunch meat sandwiches, but that all still gets old after awhile, so I've been on the lookout for healthy, inexpensive, vegetarian sandwich options.
A few months ago we went to a friend's house for a playdate, and she had, along with egg salad, "chickpea salad" sandwiches for lunch. The girls LOVED them (and so did I), she told me she just made it like egg salad only with chickpeas. I did a few searches online for something similar but everything I came up with either was more complicated than I wanted to mess with, or had stuff I didn't want to use in it, so in the end, I made up my own recipe, based off of MY egg salad recipe. I LOVE this because it's quick (I tend to forget until the morning of lessons that I'm going to need to make sandwiches, at which point getting eggs cooked, peeled, COOLED, and made into salad to put in sandwiches can be a challenge), and uses ingredients I generally have on hand (and everything is pantry ingredients until it's open, so it's easy to make SURE I stay well stocked).

Ingredients:
1 can chickpeas, drained
mayonnaise
celery salt
dill pickles, chopped fine (or I suppose you can buy dill relish, but it usually has ingredients I don't like. I buy dill pickles w/o added coloring, and don't have to worry about what my kids are eating when they inhale an entire jar in one sitting)
any other seasonings that sound good to you
I found that a potato masher works best to smash up the chickpeas w/o turning them into hummus. Once the chickpeas are mashed stir in mayonnaise, chopped pickles, and seasonings, to taste.
That's all there is to it. Super easy, and all 3 of my kids LOVE it!
I'm linking up to Try a New Recipe Tuesday.
My kids have never been much for sandwiches, in fact, for years, I rarely even had bread in the house, BUT now that we have music lessons that finish up right at (or past, if you ask my kids) lunchtime, packing lunches once a week is a part of our routine, and since we then eat those lunches as we're driving, they need to be low mess lunches (when we pack lunches to take to museums or the park or something, I'll often pack pasta salad or something similar), which tends to mean . . . sandwiches.
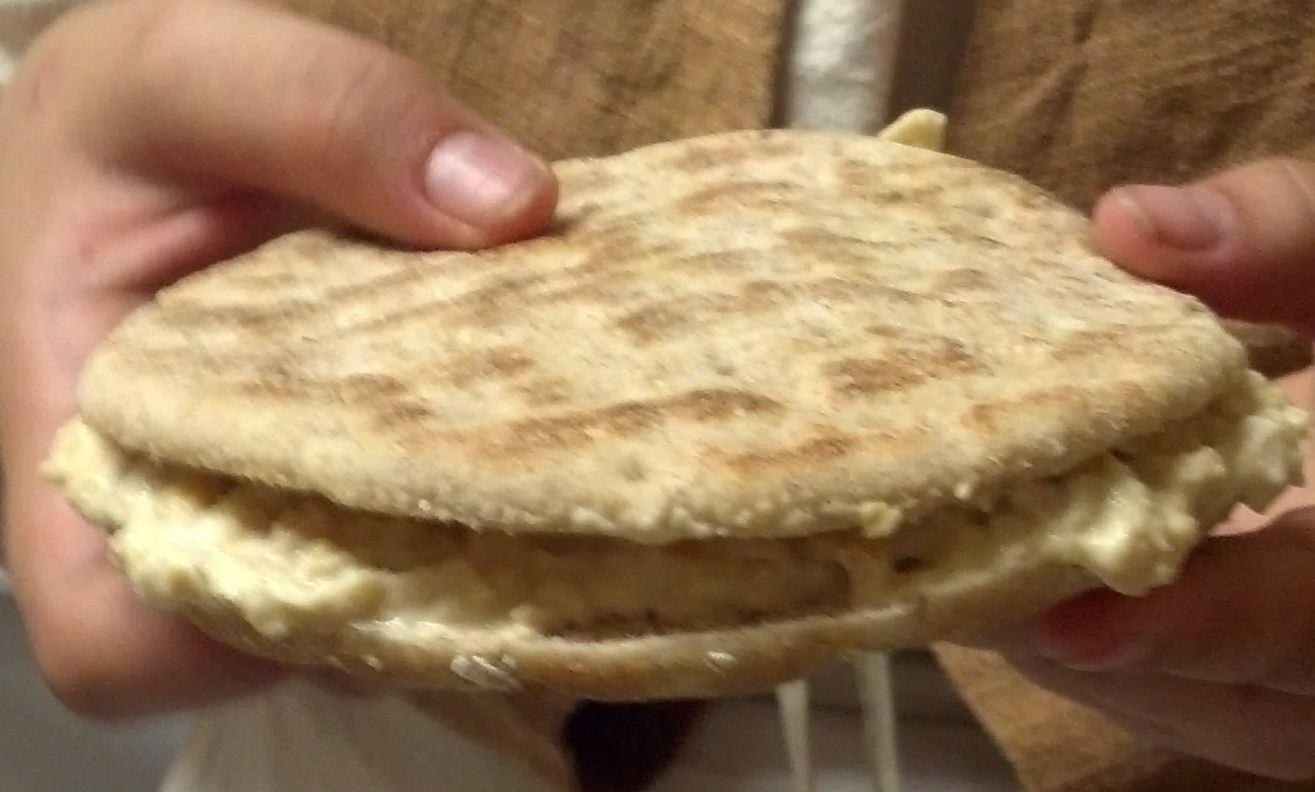
The kids do like egg salad, and will eat peanut butter and jelly (fruit juice sweetened jam), or peanut butter and (raw) honey, if I'm REALLY low on ingredients and time. And once in awhile, when I can get the Tofurkey vegetarian lunch "meat" on sale, we'll have lettuce, tomato, cheese and lunch meat sandwiches, but that all still gets old after awhile, so I've been on the lookout for healthy, inexpensive, vegetarian sandwich options.
A few months ago we went to a friend's house for a playdate, and she had, along with egg salad, "chickpea salad" sandwiches for lunch. The girls LOVED them (and so did I), she told me she just made it like egg salad only with chickpeas. I did a few searches online for something similar but everything I came up with either was more complicated than I wanted to mess with, or had stuff I didn't want to use in it, so in the end, I made up my own recipe, based off of MY egg salad recipe. I LOVE this because it's quick (I tend to forget until the morning of lessons that I'm going to need to make sandwiches, at which point getting eggs cooked, peeled, COOLED, and made into salad to put in sandwiches can be a challenge), and uses ingredients I generally have on hand (and everything is pantry ingredients until it's open, so it's easy to make SURE I stay well stocked).

Ingredients:
1 can chickpeas, drained
mayonnaise
celery salt
dill pickles, chopped fine (or I suppose you can buy dill relish, but it usually has ingredients I don't like. I buy dill pickles w/o added coloring, and don't have to worry about what my kids are eating when they inhale an entire jar in one sitting)
any other seasonings that sound good to you
I found that a potato masher works best to smash up the chickpeas w/o turning them into hummus. Once the chickpeas are mashed stir in mayonnaise, chopped pickles, and seasonings, to taste.
That's all there is to it. Super easy, and all 3 of my kids LOVE it!
I'm linking up to Try a New Recipe Tuesday.Tuesday, August 20, 2013
Don't Heat Up the Kitchen!
One of the things I miss about our last house is the central a/c. The window units in this house do a pretty good job of keeping the house comfortable, but the one area that tends to be abit warm for my liking is the kitchen, and that's withOUT turning on the oven or stove. So, this summer I've been more intentional about finding meals that don't heat the kitchen too much, since take-out all summer isn't in the budget, or diet plan!
Here are some solutions I've found:
Crockpots Are Your Friend
 I've always loved the convenience of throwing stuff in the crockpot and walking away. If your diet is abit more "normal" than ours you can find TONS of crockpot recipes and cookbooks with a few quick google searches. But for us, it's abit more challenging. The girls and I are vegetarian, that already reduces our options DRASTICALLY, and then, on top of that, dh doesn't especially like anything tomato-based, sigh . . . but here even so, the crockpot usually gets used a few times a week. Here's how:
Cooking dry beans. Lately I've mostly been making black beans, but here's where I wrote about making pinto beans in the crockpot. When I do black beans I don't add any seasonings while cooking, but otherwise it's the same idea.
Once the beans are cooked, we usually have one meal of beans and rice. I stir salsa into some of the beans to season them, then cook rice (if you have a rice cooker, that would be even less heat in the kitchen!) and serve it plain, or stir salsa into it to make "Spanish rice".
Another recipe that I use the beans for is Taco Soup. While I don't normally think of soup as an ideal summer food, the crockpot makes it lower heat than most lunch options :)
Last week I shared about making tomato soup from fresh tomatoes in the crockpot. A great way to use that garden goodness without heating up the kitchen.
Another crockpot idea I just saw and can't wait to try, is baked potatoes in the crockpot!
Salads:
Tomato Basil Salad: This really doesn't need a recipe, just chop up tomatoes, and a block of fresh mozzarella, add a handful of fresh basil, salt to taste (and a little lemon juice if the tomatoes aren't juicy enough), stir it up, and dig in.
Black Bean Salsa: This salad uses some more of those black beans I cooked in the crockpot. I haven't gotten around to posting my recipe, but this one is similar. Served with chips, it makes a yummy, easy lunch, no cooking involved (I use canned corn w/o cooking it at all)
Pasta salad - the down side is, you have to cook the pasta. What I try to do is cook a big batch of pasta for supper one night, and serve it with red sauce or butter and cheese, and then use the leftover for pasta salad for lunch the next day.
Tabouli
 Breakfast Options:
Yogurt and fruit
Chocolate Kefir Milkshake
Green Smoothie
Mock Orange Julius
Orange Cream Kefir Popsicles
and once in awhile, we might have Chocolate Coconut Ice Cream for breakfast
And those a few ways that we avoid heating up the kitchen.
 Visit the Schoolhouse Review Crew to see how other members of the crew avoid heating up the kitchen.
Here are some solutions I've found:
Crockpots Are Your Friend

Cooking dry beans. Lately I've mostly been making black beans, but here's where I wrote about making pinto beans in the crockpot. When I do black beans I don't add any seasonings while cooking, but otherwise it's the same idea.
Once the beans are cooked, we usually have one meal of beans and rice. I stir salsa into some of the beans to season them, then cook rice (if you have a rice cooker, that would be even less heat in the kitchen!) and serve it plain, or stir salsa into it to make "Spanish rice".
Another recipe that I use the beans for is Taco Soup. While I don't normally think of soup as an ideal summer food, the crockpot makes it lower heat than most lunch options :)
Last week I shared about making tomato soup from fresh tomatoes in the crockpot. A great way to use that garden goodness without heating up the kitchen.
Another crockpot idea I just saw and can't wait to try, is baked potatoes in the crockpot!
Salads:
Tomato Basil Salad: This really doesn't need a recipe, just chop up tomatoes, and a block of fresh mozzarella, add a handful of fresh basil, salt to taste (and a little lemon juice if the tomatoes aren't juicy enough), stir it up, and dig in.
Black Bean Salsa: This salad uses some more of those black beans I cooked in the crockpot. I haven't gotten around to posting my recipe, but this one is similar. Served with chips, it makes a yummy, easy lunch, no cooking involved (I use canned corn w/o cooking it at all)
Pasta salad - the down side is, you have to cook the pasta. What I try to do is cook a big batch of pasta for supper one night, and serve it with red sauce or butter and cheese, and then use the leftover for pasta salad for lunch the next day.
Tabouli
 Breakfast Options:
Yogurt and fruit
Chocolate Kefir Milkshake
Green Smoothie
Mock Orange Julius
Orange Cream Kefir Popsicles
and once in awhile, we might have Chocolate Coconut Ice Cream for breakfast
And those a few ways that we avoid heating up the kitchen.
Visit the Schoolhouse Review Crew to see how other members of the crew avoid heating up the kitchen.Monday, August 12, 2013
Recipe: Delicious Tomato Soup

So, when my neighbor gave me a bunch of tomatoes that needed to be used immediately, I decided it was time to bring out that recipe again. BUT . . . our kitchen is already the hottest part of our house (we don't have central air, so we put a window unit in the master bedroom (main floor) and one in the girls' room (upstairs). those 2, with fans blowing the cool air out of those rooms, keep the house comfortable, but the kitchen is out of the "air flow" so tends to be a tad warm even without adding heat. The last thing I wanted to do was have the stove on for THREE HOURS! So, after looking at various other tomato soup recipes online, I came up with this crockpot version:
10 cups chopped fresh tomatoes
 1 onion, chopped
3 Tbsp butter
1 1/2 tsp salt
While chopping the tomatoes, cook the onions in the butter. Put chopped tomatoes in your crockpot (aren't they pretty?). Add cooked onions and butter, and salt, stir together, turn crockpot on high, and walk away.
Let cook about 3 hours, use an immersion blender to blend, and devour! That's it!!! Yum!!
One note, even after blending there were some tomato seeds and tiny pieces of tomato skin. My kids didn't seem to notice/care, but if you, or your children, would have an issue with that, maybe push it through a sieve?
I'm linking up to Try a New Recipe Tuesday.
I'm linking up to Try a New Recipe Tuesday.Wednesday, July 10, 2013
Recipe: Cream Cheese and Spinach Taquitos
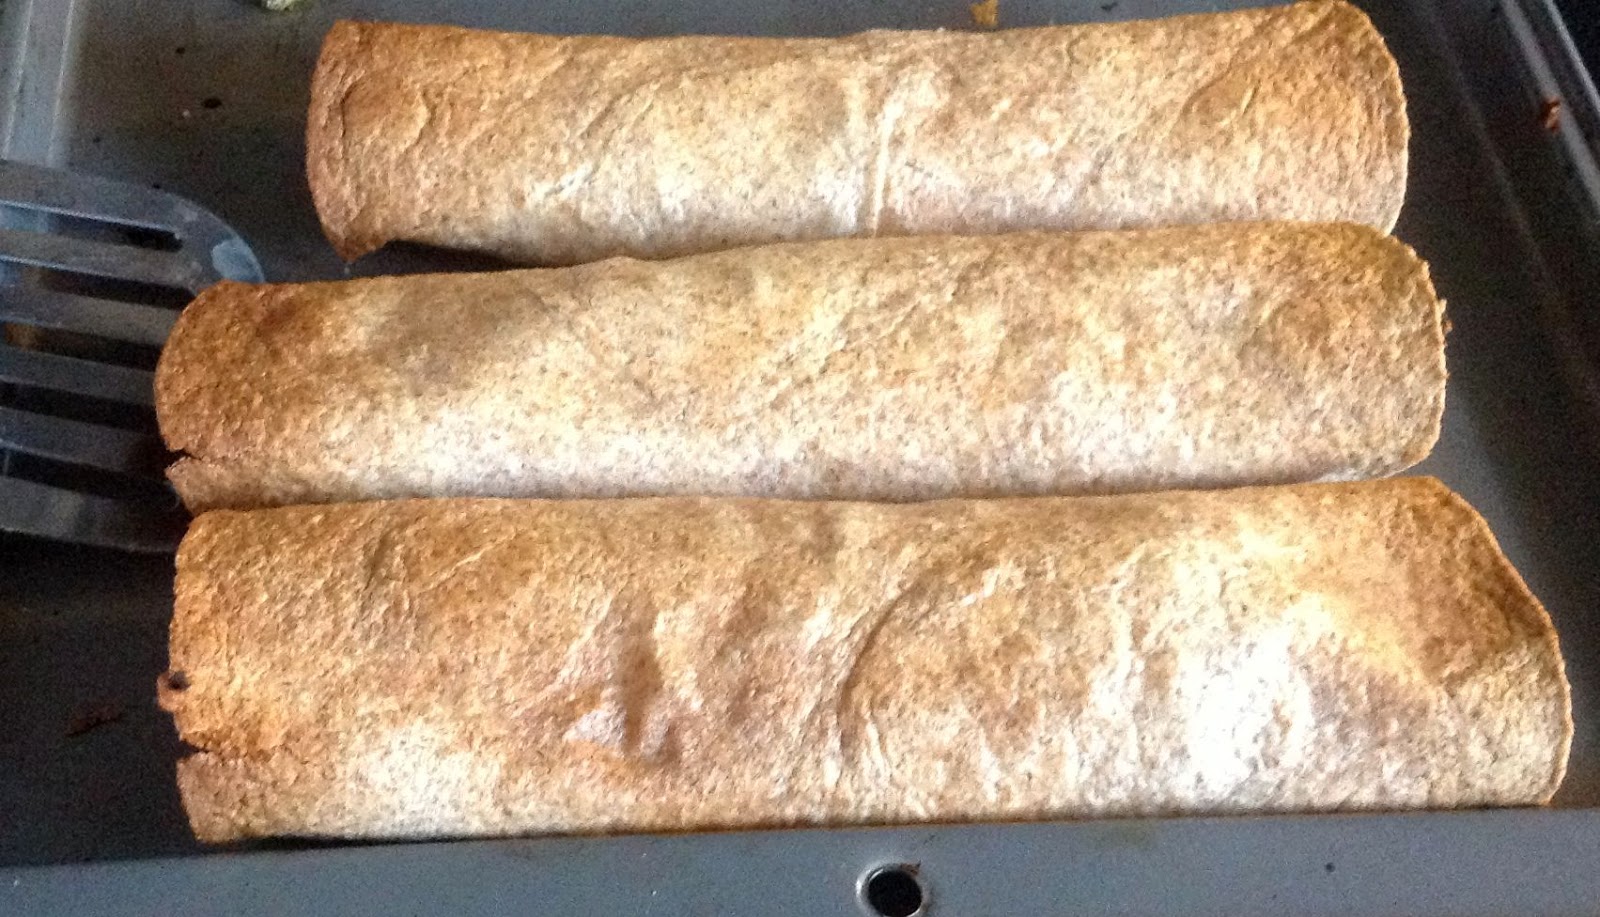 A couple months ago, I had the chance to review 3 ebooks from Simplified Pantry. My review focused on Paperless Home Organization, which I am still LOVING!! The other 2 ebooks were recipe/meal planning related, and I found that, since we're vegetarian, and some members of our family are rather picky, I needed to more pull general ideas from these ebooks (if you're NOT vegetarian, click on the link at the bottom of my review, to read other reviews of the ebooks, many people really liked them!). So anyway . . . one of the general ideas I got from the ebook was taquitos, but the suggested varieties all included meat. I decided to try this combination and the girls LOVED it! (dh wasn't home the night we made it, but I suspect he'd like it too).
As usual, I didn't really measure.
FILLING:
1 (8oz) pkg cream cheese
a good sized handful of frozen chopped spinach, squeezed dry (I buy it in large bags, and can just pull some out as needed for recipes)
1/2 a can green chilis (approximate, we'd used part of a can for something else, so I threw the rest in this recipe
1 Tbsp fresh lime juice
1 1/2 c shredded cheddar/jack cheese
Stir all together.
Preheat oven to 425. Put a spoonful of filling down the middle of a whole wheat tortilla, roll it up, and lay it, seam-down on a baking sheet. Repeat with the rest of the filling and tortillas. Spray with cooking spray (or to be healthier, brush with a healthy oil like coconut oil, olive oil, or butter (yum, butter would be AWESOME!). Bake 15-20 minutes, or until they're slightly browned.
I cut these in half, to serve the kids. They were YUMMY!!!
I'm linking up to Try a New Recipe Tuesday at Home to 4 Kiddos (some week I'll actually get the recipe post done on TUESDAY LOL).Wednesday, June 26, 2013
Recipe: Chocolate Kefir Milkshake
I think this is our current favorite kefir recipe. Even the big girls (who are extremely picky about yogurt-like-substances) like this, woo-hoo!
 As you may have noticed, I tend to not use real exact measurements, and this is no exception LOL.
You will need:
2 c prepared milk kefir
2 c milk
approx 4 Tbsp cocoa powder (to taste)
stevia and/or maple syrup (or other sweeteners) to taste
Optional:
mint leaves
mint flavoring
vanilla extract
Freeze 2 cups prepared milk kefir (I use wide mouth pint mason jars. Make sure to use wide mouth for 2 reasons, first, and most importantly, the wide mouth jars are marked as being ok to use in the freezer, the regular mouth are not, for good reason, the smaller mouth means as the liquid expands the jar is more likely to crack. Additionally, you need to be able to remove the kefir while it's frozen, since the mouth of the wide mouth jars are as wide as the rest of the jar, all you have to do is run hot water around the outside of the jar to loosen the kefir and it will slide right out. Alternately, you could freeze the kefir in freezer zip bags or BPA-free plastic containers.
Once your kefir is frozen, you're ready to make your milkshake. If you're using fresh mint leaves, put these in first. Pop the frozen kefir out of it's container into your blender (my blender isn't top of the line but it IS listed as being ok for ice, make sure you're using a blender that can handle a big chunk of frozen stuff), then add 2 cups of milk (because I'm lazy this way, I just pour milk into the jar I popped the kefir out of and use that as my "measure"). Add cocoa powder (I use a generous 4 Tbsp, but we like REALLY dark chocolate around here, I'd say start with less, it's easy enough to add more) and a little sweetener (I usually use stevia, so a few drops to start with). Now blend it all up. I usually have to stop a time or two and push the big chunk of kefir down into the milkshake so it all gets blended up.
Taste, and adjust the cocoa, sweetener, and other flavors, if using, to taste.
My kids like a thick milkshake, and this is usually abit too "melted" for them at this point (the starting point recipe I read called for ice cubes, but even though my blender says it will do ice, I try to not test the theory too often, so this is my way around that). At this point I put the blender pitcher in the freezer for however long my kids will leave it alone before they drive me batty asking "is it ready yet?".
When it's time to serve, I pull it out of the freezer, blend it again briefly, and pour it into cups.
The leftovers, I pour into popsicle molds and freeze the same way I do the Orange Cream Kefir Popsicles.
I'm linking up to Try a New Recipe Tuesday at Home to 4 Kiddos
 As you may have noticed, I tend to not use real exact measurements, and this is no exception LOL.
You will need:
2 c prepared milk kefir
2 c milk
approx 4 Tbsp cocoa powder (to taste)
stevia and/or maple syrup (or other sweeteners) to taste
Optional:
mint leaves
mint flavoring
vanilla extract
Freeze 2 cups prepared milk kefir (I use wide mouth pint mason jars. Make sure to use wide mouth for 2 reasons, first, and most importantly, the wide mouth jars are marked as being ok to use in the freezer, the regular mouth are not, for good reason, the smaller mouth means as the liquid expands the jar is more likely to crack. Additionally, you need to be able to remove the kefir while it's frozen, since the mouth of the wide mouth jars are as wide as the rest of the jar, all you have to do is run hot water around the outside of the jar to loosen the kefir and it will slide right out. Alternately, you could freeze the kefir in freezer zip bags or BPA-free plastic containers.
 Once your kefir is frozen, you're ready to make your milkshake. If you're using fresh mint leaves, put these in first. Pop the frozen kefir out of it's container into your blender (my blender isn't top of the line but it IS listed as being ok for ice, make sure you're using a blender that can handle a big chunk of frozen stuff), then add 2 cups of milk (because I'm lazy this way, I just pour milk into the jar I popped the kefir out of and use that as my "measure"). Add cocoa powder (I use a generous 4 Tbsp, but we like REALLY dark chocolate around here, I'd say start with less, it's easy enough to add more) and a little sweetener (I usually use stevia, so a few drops to start with). Now blend it all up. I usually have to stop a time or two and push the big chunk of kefir down into the milkshake so it all gets blended up.
Taste, and adjust the cocoa, sweetener, and other flavors, if using, to taste.
My kids like a thick milkshake, and this is usually abit too "melted" for them at this point (the starting point recipe I read called for ice cubes, but even though my blender says it will do ice, I try to not test the theory too often, so this is my way around that). At this point I put the blender pitcher in the freezer for however long my kids will leave it alone before they drive me batty asking "is it ready yet?".
When it's time to serve, I pull it out of the freezer, blend it again briefly, and pour it into cups.
The leftovers, I pour into popsicle molds and freeze the same way I do the Orange Cream Kefir Popsicles.
I'm linking up to Try a New Recipe Tuesday at Home to 4 KiddosTuesday, June 18, 2013
Recipe: Orange Cream Kefir Popsicles
Last week I shared how we make milk kefir, and promised that I'd add some of the ways we use that kefir soon, so here's what I do most often. Why? Because it's quick and easy and Little Bit loves them! The big girls aren't as impressed with these, but the things they like involve the blenders and such, so this is still my go-to recipe :)
 You will need:
- finished milk kefir
- frozen orange juice concentrate
- stevia drops (plain, vanilla, or orange flavor)
- popsicle molds (I LOVE these)
- plastic or wood spoon
Now you're ready to get started. Honestly, I'm not sure if, at this point, the whole "no metal" thing matters, but just in case, I go ahead and use a plastic spoon to stir this.
This is very much a "to taste" kind of recipe. I start by adding a couple big spoonfuls of orange juice concentrate and a few drops of stevia to the kefir, stir it all up, taste it, and add more orange juice concentrate and/or stevia until it tastes yummy!
If Little Bit's around I let her do the taste testing, and usually give her at least one glass as a "milkshake" (that's the jar (we use those for cups) and straw in the above picture), the rest gets poured into popsicle molds and frozen.
 I've found that it works best to put the popsicles in a glass mug in the freezer, it keeps them upright until they're frozen, and the glass seems to help them freeze (I tried putting them in a sour cream container one time and the plastic seemed to keep them from freezing as fast, but that might have been all in my head).
Once they're frozen, Little Bit happily eats 2-4 per day and I'm thrilled to know she's getting plenty of great probiotics without any added "gunk", or the expense of store bought kefir and/or popsicles :)

- finished milk kefir
- frozen orange juice concentrate
- stevia drops (plain, vanilla, or orange flavor)
- popsicle molds (I LOVE these)
- plastic or wood spoon
Now you're ready to get started. Honestly, I'm not sure if, at this point, the whole "no metal" thing matters, but just in case, I go ahead and use a plastic spoon to stir this.
This is very much a "to taste" kind of recipe. I start by adding a couple big spoonfuls of orange juice concentrate and a few drops of stevia to the kefir, stir it all up, taste it, and add more orange juice concentrate and/or stevia until it tastes yummy!
If Little Bit's around I let her do the taste testing, and usually give her at least one glass as a "milkshake" (that's the jar (we use those for cups) and straw in the above picture), the rest gets poured into popsicle molds and frozen.

Once they're frozen, Little Bit happily eats 2-4 per day and I'm thrilled to know she's getting plenty of great probiotics without any added "gunk", or the expense of store bought kefir and/or popsicles :)
Wednesday, June 12, 2013
Recipe: Milk Kefir
 This post contains affiliate links.
This is more of a "how to" rather than a recipe as such, but I have a couple recipes that I'd like to share that use milk kefir, so I figured the logical first step is with making milk kefir.
Milk kefir is similar to a thin yogurt, only it has even MORE probiotics then most (if not all?) types of yogurt! You can purchase it in some grocery stores, usually in the "health food" section, sometimes in the regular yogurt section. It's the consistency of a thick drink, and usually flavored. Last winter I started buying it sometimes for Little Bit and she LOVED it. But, of course, just like yogurt, the store-bought, flavored variety has sugar and other added "stuff" in it. And it's kind of pricey, given that she happily drank several glasses per day. BUT . . . especially during "cold and flu season" I was thrilled to be getting plenty of good probiotics into her. Sassy and MiniMe were not fans, however.
As soon as I confirmed that Little Bit loved kefir, I wanted to start making it from scratch BUT at that point we were up to our chins in house hunting and moving and all that fun stuff.
Once we had moved into our new house and were at least somewhat settled, I was finally able to order kefir grains.
Now this part is kind of confusing, kefir isn't a grain, and kefir grains don't grow in a field like wheat or barley . . . the kefir grains are the culture itself. If you've ever looked at a container of yogurt, it almost always (I've never seen one that doesn't, but there might be one, I can't imagine why though!) mentions that it contains "live cultures". That's the stuff that turns the milk into yogurt. It's also what makes yogurt so healthy. In the case of yogurt it's itty bitty tiny, can't see it, kind of stuff. It's spread all through the yogurt and to make more yogurt you (simplifying here, because this is a post about making kefir, not yogurt) stir a little bit of the yogurt into milk and let it sit and the culture grows and spreads all through the milk and it becomes yogurt. Then, if you just wanted that batch of yogurt, you eat it. If you want more yogurt, you make sure to save some of the newly made yogurt to add to more milk to make more yogurt, and so the cycle continues.
Kefir is different. The cultures, instead of being microscopic, are about half the size of a grain of rice, and you keep re-using those same cultures.
So, the first step was to purchase kefir grains (alternately, if you have a friend who makes kefir, check and see if they have extra grains, they do multiply over time). I purchased mine from Cultures for Health (it's also important to have a not-metal strainer, so I chose to purchase the Milk Kefir Starter Kit which comes with the strainer). If you purchase kefir grains they will most likely be dehydrated, and will come with directions for rehydrating. If you beg them off a (local) friend, they'll be all ready to go.
Once you have hydrated kefir grains, you're ready to start making kefir. You will need:
- kefir grains
- fresh milk (raw, pasteurized, I believe you can use non-dairy milks as well, but I haven't tried)
- a clean glass jar with a non-metal lid (or a clean coffee filter and rubber band to use as a lid)
- a non-metal spoon and strainer
Now you're ready to make kefir:
- Place the kefir grains in the clean jar, add milk (I usually do a quart at a time, the higher the grains to milk ratio, the faster it will culture. When mine starts culturing too fast for my liking, I divide the cultures, more on that in a bit).
- Cover with a non-metal lid, or a coffee filter held in place with a rubber band.
- Place the jar on the counter (or somewhere else that's room-temperature and you won't forget about it)
- Let it sit there for a day or two, checking it occasionally.
- When it starts to get thick, it's done. If the whey (thin clearish liquid) starts to separate out, it's very done.
- Strain the kefir through the strainer. This step baffled me at first, because I assumed I could POUR it through. Not so. It's too thick for that. There are various options, but what works best for me is to make sure my hands are very clean, and then use my fingers to work the kefir through the strainer.
- Now you have 2 things. You have the kefir grains in the strainer. Add them to milk in a clean jar and start over again. And you have the finished kefir.
You can do many things with the finished kefir. Our current favorites are orange cream popsicles and chocolate milkshakes. Recipes coming soon :)Despite the fact that it's no longer Tuesday, I'm linking up to Try a New Recipe Tuesday at Home to 4 Kiddos
Tuesday, May 28, 2013
One Pot Pasta
 |
| via CulinarySchools.org |
While we were visiting my parents this past weekend, my mom and I were looking were a quick meal we could fix before we headed to Harper's Ferry. I remembered a one-pot pasta recipe I'd seen where you add broccoli to cook with the pasta instead of cooking it separately, and mom remembered a recipe she'd cut out of a magazine that had olives and tomatoes mixed with pasta.
We looked at both recipes, and pulled pieces of each of them and added a few ideas of our own, and this is what we came up with. We decided it was a keeper (but we forgot to take a picture of it, maybe I'll remember and take one next time I make it, because it's a very pretty dish!).
1 lb pasta of your choice
1 lb frozen broccoli
a generous "glug" of olive oil
1/2 c chopped black olives
2 c chopped tomatoes
1 c feta cheese, crumbled
3 cloves garlic, chopped
salt to taste
grated Parmesan cheese
Cook pasta as directed. When there is 4-6 min left in your cooking time, add broccoli and cook with pasta. Drain and return to pot. Stir in all other ingredients except Parmesan. Serve with Parmesan on the side for each person to add their own.
That's it. It was yummy and super quick and easy. I have the very small serving that was left, sitting in my fridge, I'm planning to have it for lunch today to see if, as I suspect, the leftovers make a good pasta salad!
Monday, May 13, 2013
Recipe: Banana Bread Muffins
 Interestingly, while Sassy doesn't like bananas, she DOES like banana bread. So every so often we make banana bread. And, sometimes we make muffins for breakfast. So the obvious solution, when there's not time for lots of baking, is to make banana bread muffins!
1 3/4 c whole wheat flour
1 tsp baking powder
1/2 tsp baking soda
1/4 tsp salt
2-3 bananas, mashed (1 cup)
1/3 c honey
1/4 c butter, melted
2 eggs
Preheat oven to 400 degrees.
Stir dry ingredients together. Mix in mashed bananas, honey, butter and eggs.
Spoon into 12 greased muffin cups. Bake about 20 min.
If you'd rather make this as bread, you can put into a greased loaf pan and bake at 350 for 50-60 min.
Yummy either way!!!
Subscribe to:
Posts (Atom)